
Big Walk Backpacks & Hip Bags — All Locations
A nine-building bag route with normalized coordinates, landmark checks, capacity rules, lantern limits, and handoff discipline.
Table of contents
Big Walk has six backpacks and four hip bags across nine blue bag structures. Wearing both types lets one player transport a back item, a hip item, and an object in their hands—but a teammate must equip the bags for them.
Recognize a bag building
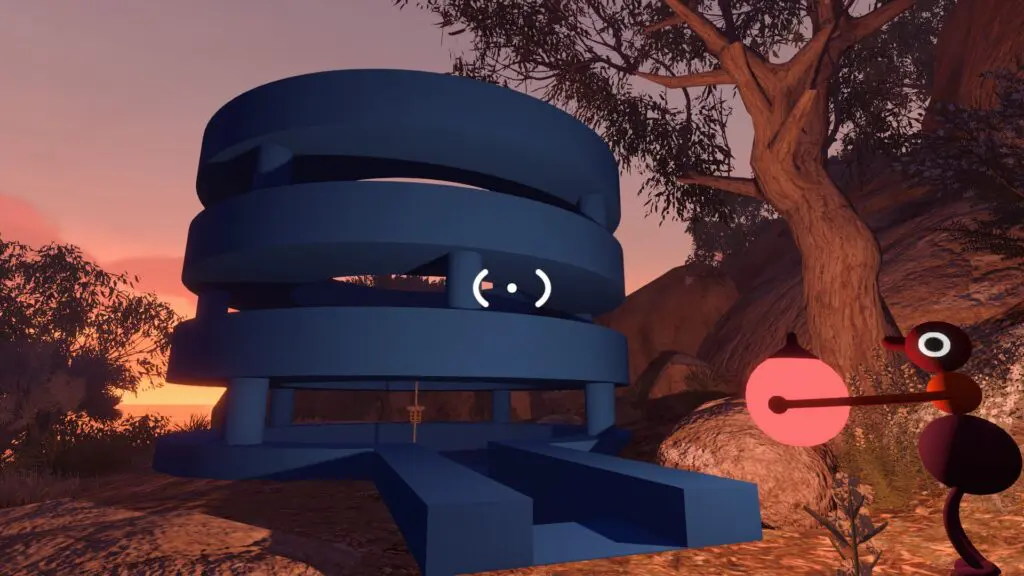
Look for a blue circular structure shaped like an open basket or parking ramp. A short blue ramp leads inside. Most structures hold one bag; the far-southeast building at 4340, 2025 holds both a backpack and a hip bag.
The coordinates below use the same horizontal-then-vertical grid order as this site's Map Room guide. Some release-day notes recorded several axes in reverse, so treat every number as an approximate approach and confirm the blue building before searching the floor.
All backpack locations
| Colour | Approximate grid | Landmark check |
|---|---|---|
| Yellow | 3750, 1380 |
Close to the Red Tower side of the map |
| Green | 3720, 1660 |
On the central mountain, near the light-green music area route |
| Pastel pink | 4275, 1775 |
Blue bag structure near the southern chairlift side |
| Pastel blue | 3500, 1540 |
Near the Map Room / Red Tower route |
| Pastel red | 3310, 2000 |
Beach-side route away from Yellow Tower, toward the green barrier |
| Red | 4340, 2025 |
Far southeast, reached conveniently from the chairlift; shares the structure with a hip bag |
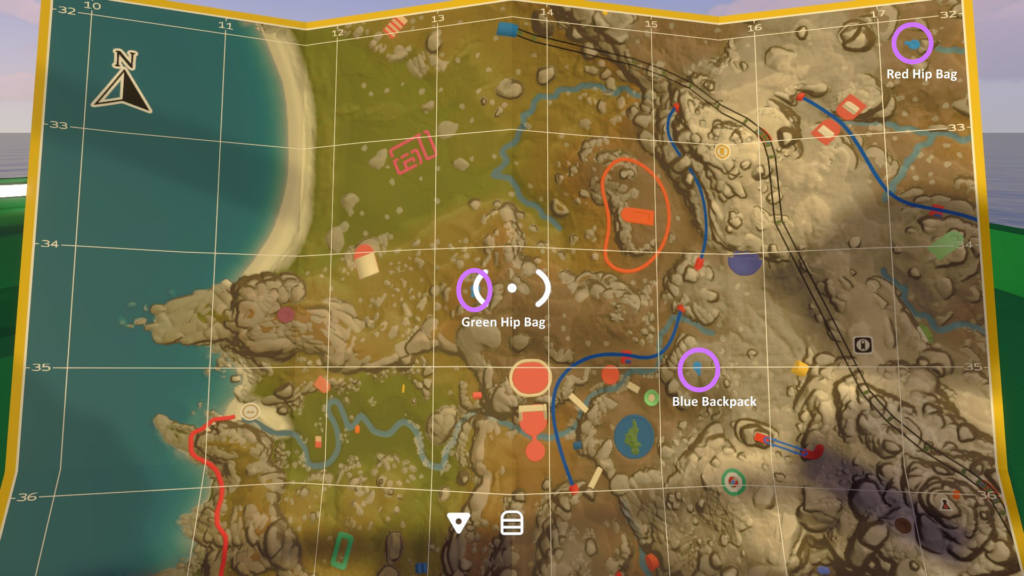
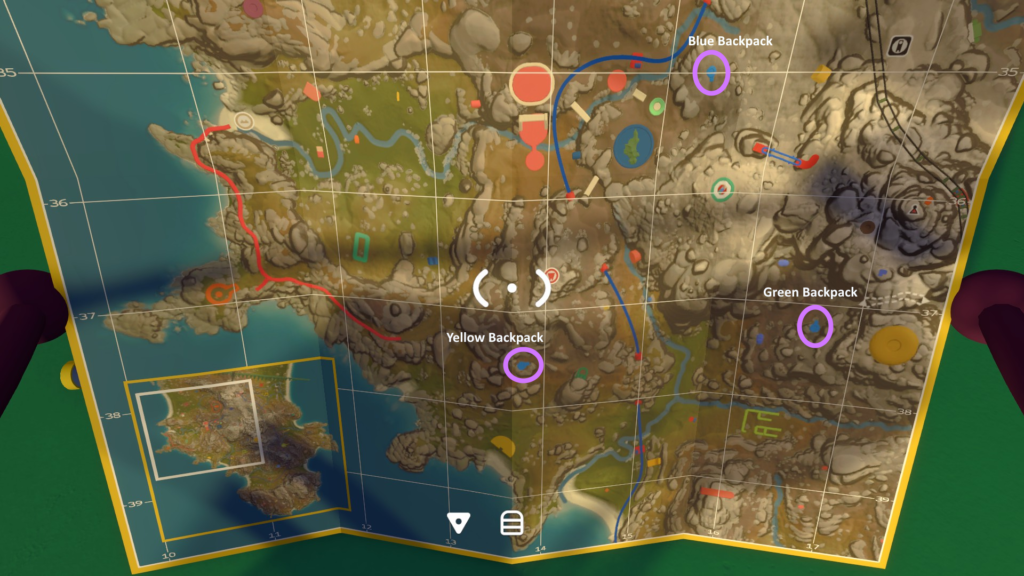
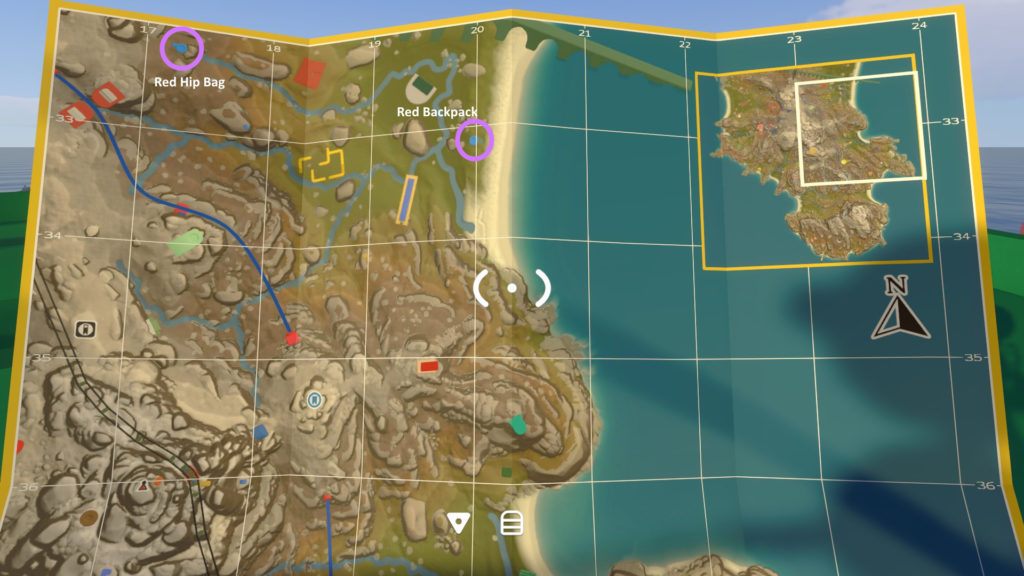
All hip-bag locations
| Colour | Approximate grid | Landmark check |
|---|---|---|
| Yellow | 3750, 1860 |
Mountainside on the Green Tower side |
| Green | 3440, 1330 |
Between the Map Room side and Yellow Tower side |
| Red | 3220, 1720 |
Near the Yellow Tower route |
| Blue | 4340, 2025 |
Far-southeast shared structure; take the chairlift south, then continue southeast |
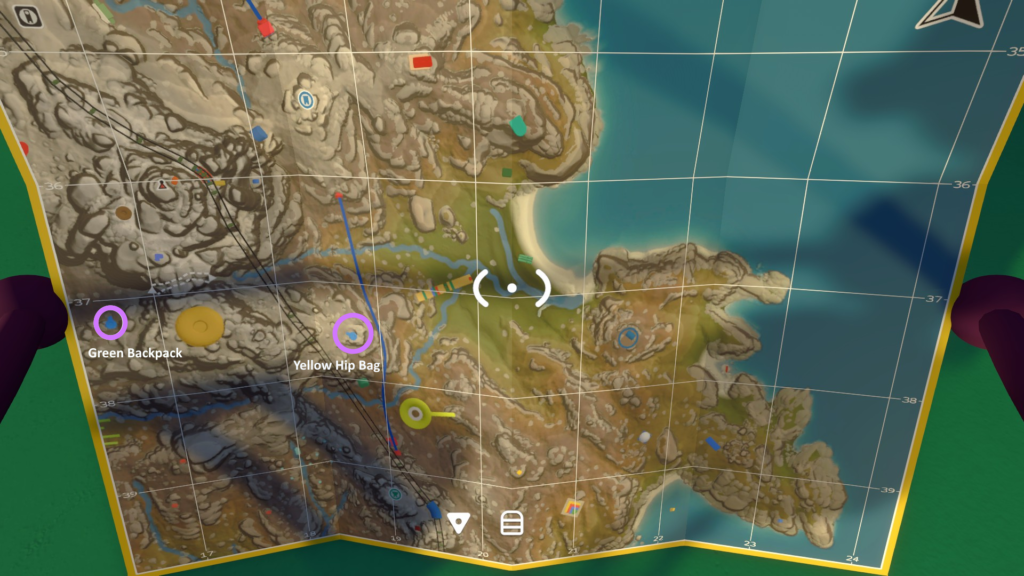
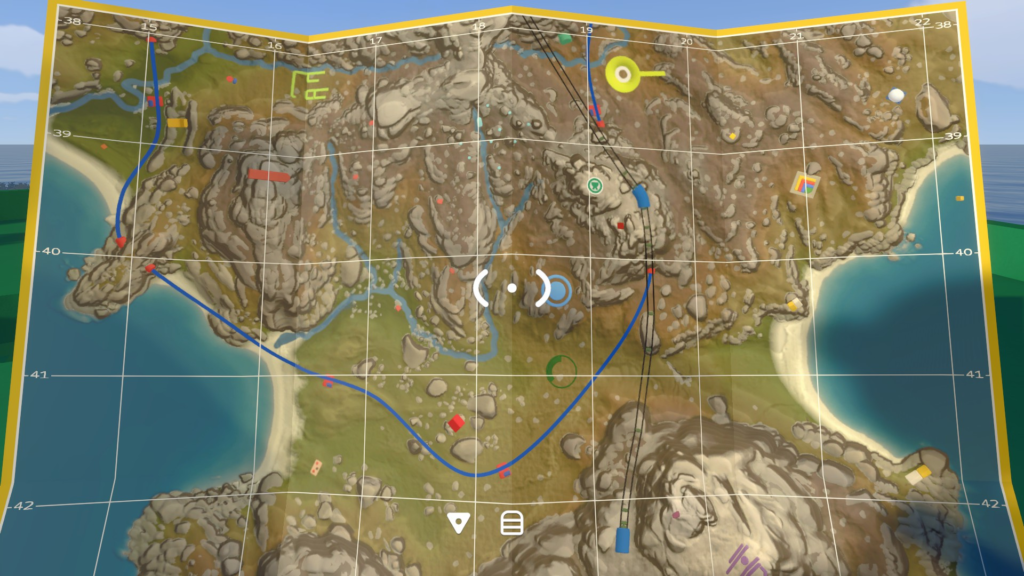
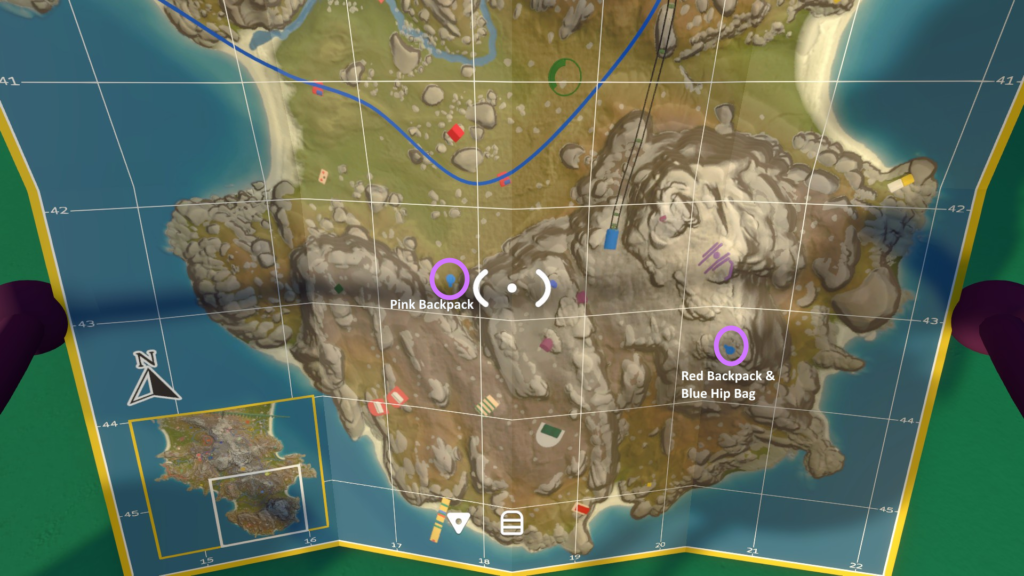
The colour does not change capacity. Choose a colour for player identification, not because one bag is stronger.
How to equip a bag
- One player picks up the backpack or hip bag.
- The intended wearer stands still with the correct attachment point visible.
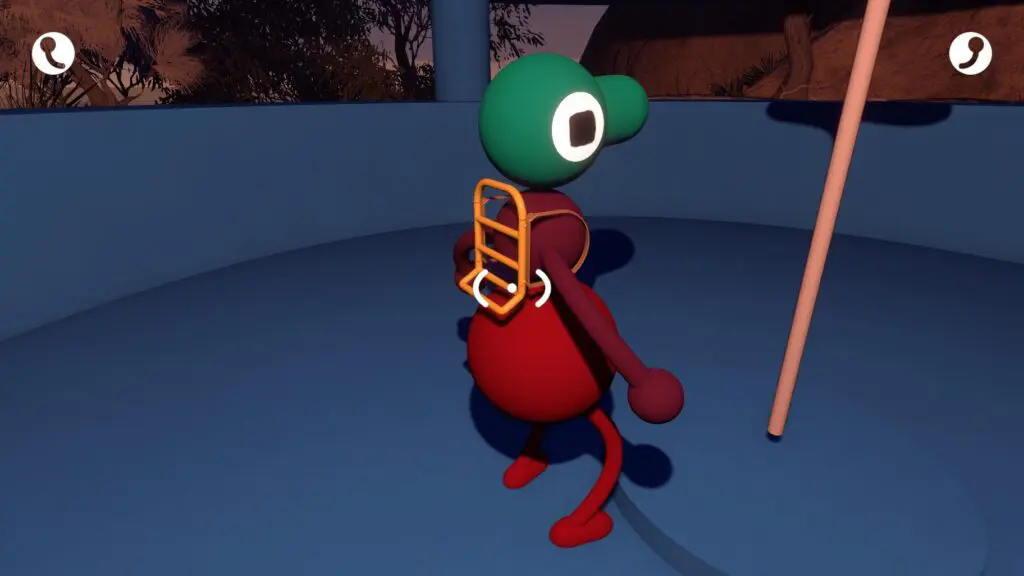
- The carrying player approaches until a white interaction circle appears on the wearer's body.
- Attach the bag to that highlighted point.
- Repeat with the other bag type if the player will carry both.
You cannot reliably equip your own bag without another player's interaction. Before leaving the structure, confirm that the backpack is on the back and the triangular hip bag is at the side rather than lying on the ground.
Carry three useful objects
A fully equipped player has three practical carry positions:
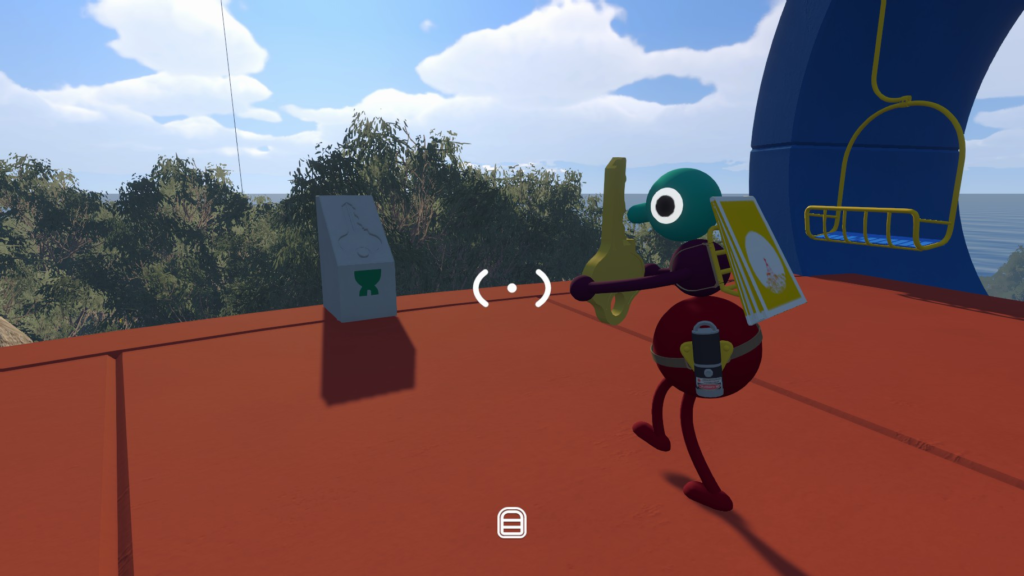
- one suitable object attached to the backpack;
- one suitable object attached to the hip bag;
- one object held in the hands.
Use the hands for the object that must be thrown, inserted, or operated next. Put the longer-term navigation or communication item on a bag. For example, a route carrier might wear the handheld radio on one attachment, store a compass on the other, and keep a golden key in their hands.
Round lanterns do not attach to the backpack. Assign a separate light carrier instead of repeatedly trying to force the lantern onto the bag.
Bags are shared, not private inventory
Another player can remove and use an attached item. This is useful for tool handoffs, but it also causes the common “missing item” problem.
Before moving:
- name the owner of each carried objective;
- state whether teammates may borrow it;
- return borrowed tools to the same attachment point;
- visually check all three carry positions before boarding transport or leaving a puzzle.
If something disappears, inspect the wearer's back and hip, then the ground at the last interaction point. Do not retrace the whole island until every player has checked their own attachments. If the item is still missing, use the Lost & Found recovery guide before replacing it or repeating a completed puzzle.
Best early bag route
After opening the Crosswalk and Map Room side, use the nearby pastel blue backpack around 3500, 1540 as an early target. It gives the group carrying capacity before long tower-key and transport trips. Later, collect a hip bag along the next chosen tower route rather than crossing the whole island only for colour.
For a large party, the far-southeast building is efficient because it supplies both bag types at one stop. Reach it only after the chairlift route is running; otherwise the travel cost outweighs the early carrying benefit.
Related guides
Big Walk Communication Tools
Choose radios, walkie-talkies, megaphones, flares, cowbells, whiteboards, pointers, or gestures for the current constraint.
Read guideBig Walk Interactive Map — 230 Locations & Puzzles
Search 230 Big Walk locations on a terrain map, isolate all 45 puzzles, inspect solution cues and screenshots, track found markers, and open related wiki guides.
Read guideBig Walk Train Route — Board, Stop & Regroup
Unlock the three train loops, stop a carriage with its front lever, board as a group, and recover players who miss a station.
Read guideBig Walk Chairlift Route — Board & Regroup
Unlock the Green Tower chairlift, board moving chairs from the platform, protect carried items, and reunite separated players.
Read guide