The interactive island map above combines a terrain layer with 230 location
markers: 45 puzzles, 17 puzzle parts, 25 key cutters, towers, train and lift
stations, navigation tools, bags, radios, toys, and major landmarks. Search a
name, choose one of the 28 marker types, or press Puzzles to reduce the map
to the main puzzle entrances. Each selected point includes a recognition image
and any available location, solution, and reward notes.
The terrain pin is a visual island position, not a four-digit reading from the
in-game coordinate tracker. The 50 approximate readings in the tables below
come from a played route and remain useful for groups carrying the portable map
and tracker. Treat both layers as route aids: a world update or variant may
move an object, and this page does not claim that every possible variant is
exhaustive.
Both navigation tools are on a table inside the Map Room at approximately
3560, 1425. The group must first lower the Crosswalk, fill the Red Tower
panel, pass its golden key through five cutters, and open the long-staircase
entrance.
Use the focused map and compass location guide
for the complete unlock route, pickup position, and locked-door checks. Return
here once a player is ready to read the grid or look up a documented landmark.
Use the two values as map-grid axes instead of trying to convert them into real
world latitude and longitude.
For a reading such as 3420, 1250:
34 identifies the first axis's numbered grid square;20 places the marker roughly one fifth of the way through that square;12 identifies the second axis's numbered grid square;50 places it halfway through that square.
The last two digits are useful for closing in on a target, but nearby terrain
and the building colour are easier to recognize while walking. If the reading
seems to place you on the wrong side of a ridge, stop and compare the landmark
description before committing the whole group.
| Location |
Approximate grid |
What to look for |
| Beach control panel |
3550, 1100 |
Low circular panel below the raised Crosswalk |
| Crane button |
3520, 1280 |
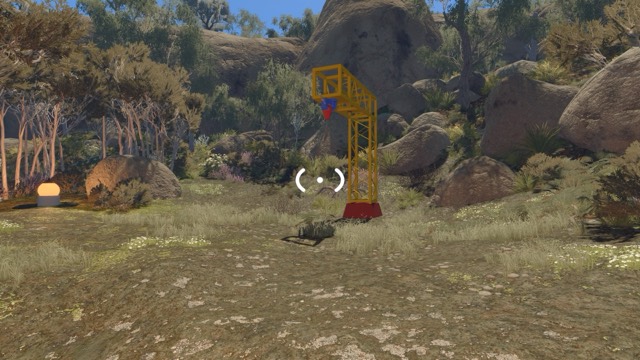
Yellow crane between boulders below the tutorial exit |
| Telescope platform |
3510, 1195 |
Telescope, held button, and distant red signal |
| Blue symbol house |
3660, 1295 |
Blue building with nine handled symbol pieces outside |
| Green scaffold |
3650, 1220 |
Two-sided scaffold with timed red buttons |
| Map Room entrance |
3560, 1425 |
Blue building reached by a long red staircase |
| Red Tower |
3670, 1400 |
Tower above the Map Room route |
| Glass signal room |
3760, 1430 |
Green building with a locked glass panel room |
| Beach timer maze |
3840, 1350 |
Split paths joined by a handoff window |
| Heavy-ball relay |
3740, 1620 |
Dark purple-blue platform in the forest |
| Lantern hoop |
3830, 1560 |
Hoop and visible scoring meter |
| Launcher return |
3880, 1520 |
Yellow platform overlooking a small station |
| Location |
Approximate grid |
What to look for |
| Blue Tower |
3540, 1850 |
Control tower tied to train access |
| Main train station |
3380, 1740 |
Station lock set into the mountain northwest of the tower |
| Turnstile symbol house |
3505, 1960 |
Red building with two yellow turnstiles |
| Five-minute room |
3590, 2020 |
Red house with a large black countdown |
| Cooperative obstacle course |
3700, 1950 |
Wall, block stairs, planks, and timer handoff |
| Golden-head course |
3360, 1930 |
Walled course with the golden head outside |
| Charades room |
3250, 1940 |
Split pose room with nine action pieces |
| Location |
Approximate grid |
What to look for |
| Green Tower |
3930, 1900 |
Tower beside the main chairlift station |
| Main chairlift station |
3950, 1950 |
Blue structure with red floor and key slot |
| Split signal rooms |
3825, 1930 |
Yellow-green building with two locked rooms |
| Coastal crane switches |
3790, 2250 |
Large beach crane between distant switch stands |
| Invisible-symbol building |
3740, 2140 |
Blue building inside a large blue map circle |
| Hidden-lamp arena |
4020, 1870 |
Blue circular arena filled with yellow lamps |
| Head-count arena |
4100, 1880 |
Green arena with ten blue lamps and a number counter |
| Location |
Approximate grid |
What to look for |
| Yellow Tower |
3310, 1560 |
Final control tower covered by the spoiler-light route |
| Yellow Tunnel |
3500, 1620 |
Entrance along the rock face opposite a blue bag structure |
| Four-colour collection |
3370, 1490 |
Large search area with trees, rocks, red centre, and rail |
| Six-microphone check |
3400, 1230 |
Large beige-and-red archway |
| Five-speaker match |
3200, 1260 |
Beige-and-red striped sound building |
| Mirrored stage |
3410, 1590 |
Dark blue-and-black stage south of the tower |
| Aerial symbol chair |
3570, 1600 |
Crescent chair running between two platforms |
| Cliff light/button rooms |
3290, 1670 |
Facing grey buildings separated by cliffs |
Use the same order every time: first axis, second axis, landmark. For
example: “3550, 1100, low beach panel.” Ask the receiver to repeat all three
parts before the group splits.
When a coordinate conflicts with the visible world, trust the unmistakable
landmark and note the discrepancy. A future update or different world variant
may change an object while leaving the broader route intact.
The map workspace and the coordinate tables answer two different navigation
needs:
- Search the 230-marker terrain map by puzzle, tower, key, train, lift, bag,
radio, tool, or visible landmark.
- Press Puzzles for the 45 primary puzzle entrances, or Puzzle parts for
remote buttons, boxes, pictures, tees, and other linked components.
- Switch zoom 9 through 13 to move from the whole-island view to a close route
check. Zoom 12 and 13 magnify the complete zoom-11 terrain; they do not add
new source-image detail.
- Select a marker to compare its map position, gameplay screenshot, location
cue, solution outline, and reward without leaving the page.
- Mark points found; the checklist stays in this browser and is not sent to an
account.
- Follow a related wiki guide only when this site has reviewed a confident
match. Otherwise use the marker facts and screenshot instead of assuming a
thin or unrelated walkthrough.
For a spoken coordinate call, use the separate four-digit tables on this page.
For visual route planning, use the terrain map. In either case, an unmistakable
building, tower colour, or puzzle prop is the final check when several markers
sit close together.