
Big Walk Super Camouflage Box Puzzle
A two-switch synchronization route for the harder-to-spot streamside box.
Table of contents
Quick answer: place one player at the switch on top of the large rock near the stream and another at the paired switch farther downstream. Hold those two positions, use one spoken countdown, and press both controls together. Check for the Red Blob before either player walks away.
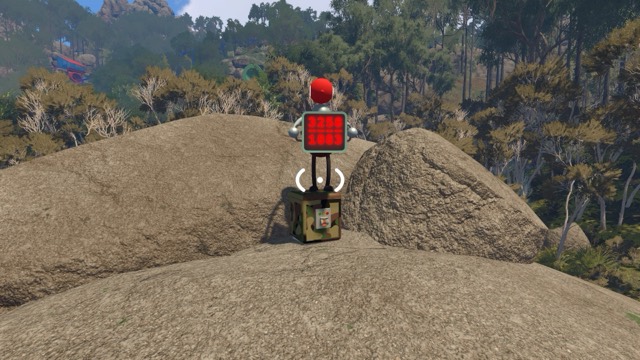
Identify the rock-top puzzle station
The puzzle station is hidden on top of a large rock near the stream. Use the interactive map, select Super Camouflage Box Puzzle, and climb to the bare rock with the handled control. This is the station one player must keep occupied while the other searches downstream.
Find the linked downstream switch
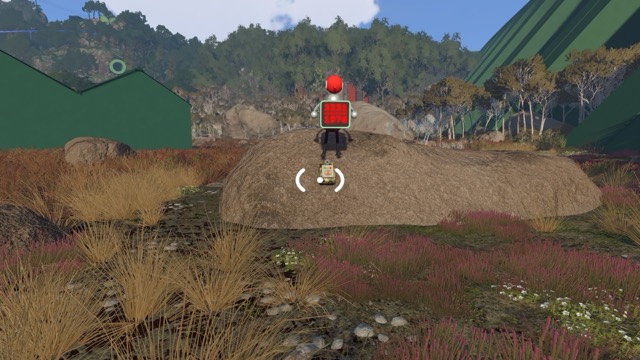
The paired control has its own map entry, Super Camouflage Box Switch. It is farther down the stream, on a lower rock between large green structures. Do not stop at the first unrelated button you see along the water: compare the rock, the nearby green walls, and the control's handled shape before calling ready.
| Station | Recognition cue | Player job |
|---|---|---|
| Rock-top puzzle control | High bare rock near the stream | Stay beside this control and wait for the caller |
| Downstream linked switch | Lower streamside rock between green structures | Confirm the linked station, then hold position |
Assign one operator to each station
- Rock Operator: remains at the high-rock puzzle control.
- Stream Operator: follows the stream to the separately mapped switch.
- Caller: one of those two operators owns the countdown so the team does not react to two competing signals.
Extra players can scout or watch the box, but the verified mechanic needs the two linked controls. The available evidence does not define a different input count for larger groups.
Stage the route before pressing anything
- Open the interactive map and identify both named markers.
- Send the Rock Operator to the high bare rock first.
- Send the Stream Operator downstream without moving the Rock Operator.
- Have each player describe the rock and surrounding landmarks shown above.
- Test voice chat, then agree that only the Caller will count down.
This staging step prevents the most expensive failure: abandoning a confirmed station, then discovering that neither player can retrace the route.
Phase 1 — lock both positions
Each operator moves within interaction range but does not press. The Rock Operator repeats rock-top ready; the Stream Operator repeats downstream ready. If either player is unsure, stop here and compare the two station images again.
Phase 2 — press on one countdown
- The Caller announces one short countdown.
- Both operators press their current controls on the agreed word.
- Neither player leaves immediately; wait long enough to inspect the puzzle and reward state.
- If nothing changes, return to the same ready positions before retrying.
No exact timing window or required hold duration is verified. The useful rule is simply to make one clean, coordinated current-attempt press rather than hammering the controls at different times.
Confirm the solve before leaving
The recorded completion result is a Red Blob. Use that reward state—not the red numbers visible on either control—as the completion check. The two station screenshots identify the inputs; they do not show the reward being collected.
Recover from the first uncertain point
If the box remains closed, do not immediately scatter the team:
- Confirm both operators are still at the pictured stations.
- If the Stream Operator used another stream switch, return to the separately mapped downstream control.
- If both stations are correct, restage interaction range and choose one Caller again.
- Make one synchronized retry, then inspect the Red Blob state.
- If the selected world visibly requires another active station, follow that visible requirement instead of forcing this two-station route.
What the current evidence does not prove
The photographed red display values are not a verified reusable code. The available evidence also does not establish a numeric timing window, button hold duration, activation sound or light, reset effect, or complete world-size and player-count variants. Keep those as observation gaps rather than inventing a more precise solution.
Return to 13 island Red Blob puzzles or compare the hold-button route in Camouflage.
Related guides
Big Walk Island Puzzles — 13 Red Blob Solutions
Find and solve 13 additional Red Blob challenges across the island, from paired switches and hidden boxes to symbol, sound, and movement rooms.
Read guideBig Walk Interactive Map — 230 Locations & Puzzles
Search 230 Big Walk locations on a terrain map, isolate all 45 puzzles, inspect solution cues and screenshots, track found markers, and open related wiki guides.
Read guideBig Walk Puzzle Teamwork
Choose a 2, 3, or 4+ world, divide observation jobs, and use in-game communication limits as part of the puzzle.
Read guide